Ok, you’ve got your node up and running and you’ve actually got some lessors. Now you need to pay these guys, otherwise they’ll just lease their $TN to another node.
Because i’m more of a Windows guy i figured out how to run your LPOS Distribution from your local Windows machine, instead of running it on your node VPS itself. To help other node owners, here’s how i did that:
There are two LPOS Distributors out there for the TurtleNetwork:
- BlackTurtle’s instructions, based on Waves LPoS Distributor: https://github.com/BlackTurtle123/TurtleNetwork/wiki/LPOS-Distributor-Tutorial
- BoxiGod’s TN Fork of the same: https://github.com/BoxiGod/TurtleNetworkLPoSDistributer
This how-to is based on BoxiGod’s fork.
p.s. I’m not distributing any node tokens to my lessors, only $TN. If you do want to do this for your node your configuration of appFastNGHOLD.js will be slightly different.
1. Laying the groundwork
- First we need to download and install Node.js (https://nodejs.org/en/), just grab the latest LTS (10.16.0 LTS currently) and install it on your machine (just let everything stay default during installation).
- Then download the current version of BoxiGod’s TurtleNetworkLPoSDistributer from the link above (click on Clone or download and then Download ZIP).
- Extract the ZIP file to your local harddrive (i.e.
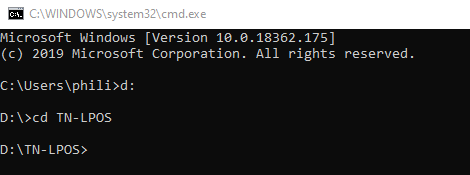
D:\TN-LPOS\, i’ll be using this one for the rest of this how-to). - Open a cmd-windows (Windows key+R and then
cmdand change to the directory you just extracted.

- Create a new directory for the dependencies to be installed in and install them:
mkdir node_modulesnpm install

Ok, that’s the groundwork done.
2. Configuring appFastNGHOLD.js
Quick addendum, i’ve talked to BoxiGod and he will be putting some of my changes in an updated version soon. Once that version is released i’ll update the required changes here.
The current version of BoxiGod’s has the changes implemented.
There a couple of files that need to be altered, first the file responsible for that actual calculation of the payouts:
Open appFastNGHOLD.js in your favorite editor (i would recommend Notepad++) and head to line 27 where you see this:

Starting on line 28, here’s the stuff that needs to be changed:
- Add a new line above
address: '',with the following:apiKey: '',– and enter the apikey you created while you configured your node address: '',– enter your node address herealias: 'Your node alias',– enter your node alias herestartBlockHeight: 1,– for your first run we leave that unchangedendBlock: 76720,– for your first run put 100000 herenode: 'http://localhost:6861',– change that to your node public ip addresspercentageOfFeesToDistribute: 80,– change it to the percentage of acquired fees you want to distribute to your lessors- the remaining lines are for distribution of node tokens which i don’t do, so enter the information required if you want to distribute your own tokens to lessors and holders.

Next we need to fix some small bugs in the code i found:
Find richlist= JSON.parse(syncRequest('GET', config.node + '/debug/stateTN/' + config.endBlock, { around line 117 and replace
'Connection': 'keep-alive'with:
                'Connection': 'keep-alive',
		'api_key': config.apiKey
and lastly we need to head to line 292 and replace:
if (Number(Math.round(BTN[address] * Math.pow(10, config.decimalsoftoken))) > Number((config.minBTNpays*Math.pow(10,config.decimalsoftoken)))) {with:
if (Number(Math.round(BTN[address] * Math.pow(10, config.decimalsoftoken))) > Number((config.minBTNpays*Math.pow(10,config.decimalsoftoken))) && (config.assetId != '')) {this stops adding empty payments for non-existent node tokens, it shouldn’t interfere with distribution of node tokens if you do use them though.
Now save the file and let’s fire her up to see if she runs. Switch back to your command-line window and type:
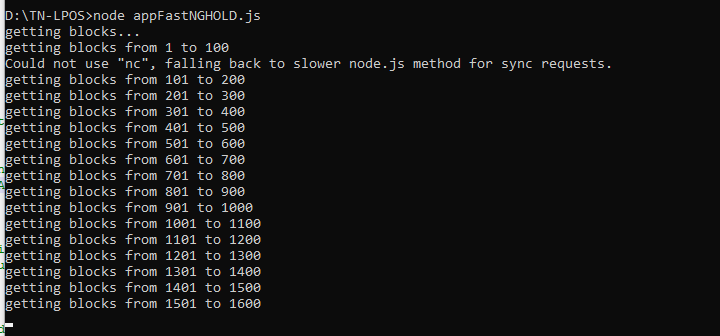
node appFastNGHOLD.jsthis should result in it grabbing the first 100000 blocks:

Now remember that i said that we should set endBlock to 100000, that’s because 100000 blocks is about the most node.js can handle at one time without throwing a memory error.
So we will need to run node appFastNGHOLD.js a couple of times, each time setting startBlockHeight to the endBlock of the previous run and setting endBlock up another 100000 or to the block you want to calculate up to once it’s within 100000 blocks.
Once all blocks have been grabbed the script will create the payment.json file that holds the actual payments to the lessors. This can take a while, especially creating the data-structures from the blocks. Just be patient, it can easily take up to an hour for it to finish.

Your payments.json file should look something like this:

3. Checking your payouts
Now that the payments.json file has been created we need to verify if the payments are correct (you can skip this step if you want to, but i do recommend it).
First we need to configure the checkPaymentsFile.js. The only thing we need to update here is the public IP address of your node on line 12:
var config = {
    filename: 'payments.json',
    node: 'http://localhost:6861'
};
Save the file and run it from your command-line window:
node checkPaymentsFile.jsWhich should give an output similar to this:

4. Doing the actual payouts
Now that we’ve checked and verified everything we can do the actual payouts to your lessors. For this we need to configure the file for the payments. Open massPayment.js and change lines 14, 15 and 16 to what they need to be. If your not doing node token distribution just leave line 16 as is:
var config = {
filename: 'payments.json', // put the file name where payments have been written.
node: 'http://localhost:6861', // put the IP address of your REST API node
apiKey: '', // put your secret API Key
feeAssetId: null,
fee: 2000000 // put 2000000 (0.02 TN)
};
Save the file and run it from your command-line windows:
node massPayment.jsThis will process the payments.json and create and send the transactions for your lessors on the network, sending them the earned fees for leasing with your node.
5. Doing payouts through mass transfer
Alternatively you can do your payouts through one mass transfer transaction. This uses masspay.js instead of checkPaymentsFile.js and massPayment.js.
Once again we need to update the config section of the file with the required information:
var config = {
    filename: 'payments.json', // put the file name where payments have been written.
    node: 'http://localhost:6861', // put the IP address of your REST API node
    apiKey: '', // put your secret API Key
    feeAssetId: null, // TN token
    feeAssetId2: "", //assetId of node's token
    fee: 2000000, // put 2000000 (0.02 TN)
    x: 0 // if 0 - check transactions, 1 - do trans. DO FIRST RUN WITH 0 TO CHECK THE TRANSACTIONS
};
Important here are node, apiKey and x (and perhaps feeAssetId2 is you are distributing node tokens).
Initially leave x: 0 to run a check on your payments (similar to checkPaymentsFile.js), save the file and run it from your command-line windows:
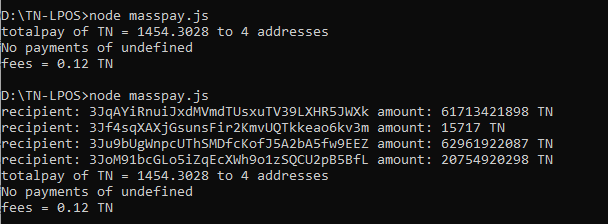
node masspay.js
If you’re happy with the output, and it all makes sense (for some more information you can uncomment lines 50 and 56) change x: 1 and run it again to do the mass transfer.
And that’s it, you’ve done your first (of hopefully) many payments to your lessors. After your first run here’s a quick list of what you need to do for all subsequent runs:
Your next payments
After you’ve done your first payment with this how-to most of your configuration is done. But there are a few steps you need to take each time, here’s an overview:
- Edit
appFastNGHOLD.jsand setstartBlockHeightto theendBlockof the previous run and setendBlockto the current block. - From a command-line window change to your LPoS directory.
- run
node appFastNGHOLD.js - run
node checkPaymentsFile.js - verify the payments scheduled
- run
node massPayment.js


2 Replies to “LPOS Distribution from Windows”
[…] wanted to post two fixes / additions people that are using my LPOS Distribution from Windows or BoxiGod’s LPOS fork in […]
[…] Next we need to configure your REST API, that’s required to being able to access certain feature of your node from external addresses (for instance using my LPOS Distribution setup). […]