…on an Azure VPS from a Windows PC
There are already a few setup guides out there (https://github.com/BlackTurtle123/TurtleNetwork/wiki/Setting-up-a-$TN-node and https://www.maplenode.net/tutorials/how-to-create-a-node/) and most of this information is from those sources, but i was asked to create this tutorial for the Windows users out there, so here goes.
First off, the node itself will still run from Ubuntu, so a bit of Linux knowledge is recommended. Otherwise here’s a short cheatsheet: https://www.linuxtrainingacademy.com/linux-commands-cheat-sheet/
The requirements for running the node are:
Operating System; | Ubuntu 16.04
Hosting type | VPS
– CPU 1 CPU vCores
– Memory 2 GB Memory
– Storage 50GB (SSD preferred)
Configuration; | Static IP Required
Access; | Root access required
TurtleNetwork (TN) required for a node | 1 000 TN
On your windows machine you really just need putty (and puttygen for the SSH Public key) to connect to the Azure VPS once it’s setup.
1. Create the Azure VPS
- Head over to Azure and logon (if you don’t have an account yet you can create one for free here).
- Click on Create a resource in the top left corner
- Click on Compute and select Virtual machine
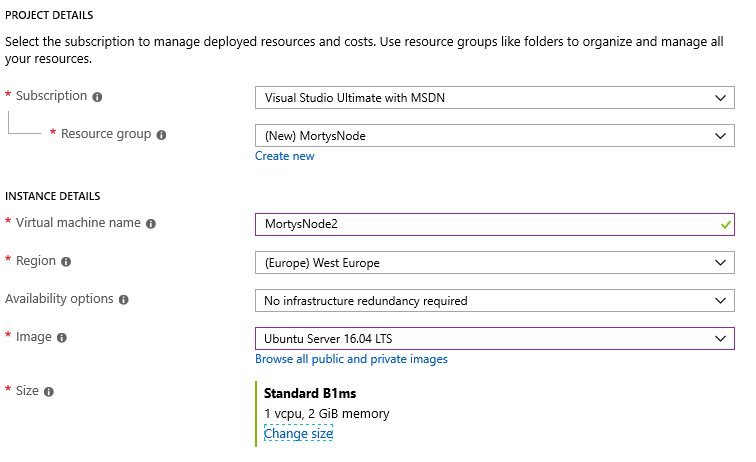
On the next page we are going to fill out the details of the virtual machine:
- Select the subscription you want this VPS billed on
- Select a Resource Group or create a new one
- Enter a name for the VPS
- Select your region
- Under Image select Ubuntu Server 16.04 LTS
- Click Change size next to Size and select Standard B1ms (this VPS has the requirements stated above and won’t cost you an arm and a leg)
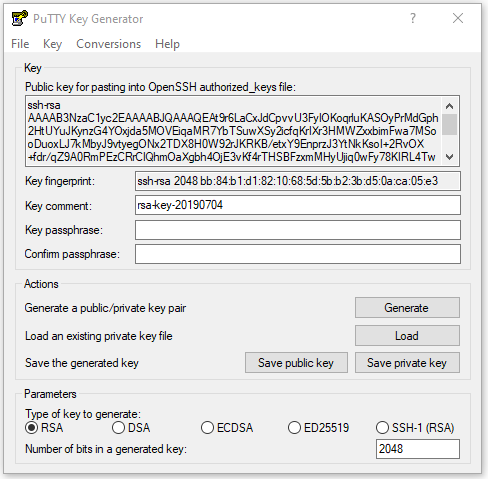
Next we need to setup remote security. You have a choice here, either use a password (less secure) or use an SSH public key (which i recommend and will explain here).

Fire up puttygen and press Generate, move your mouse around in the center field and presto, we have an SSH Public Key. Be sure to save both the public and private key in a safe spot.
After you’ve created the public key paste it in the field on the Azure portal and put in a username you like.
The last part on the first page of Create a virtual machine / Basics will be Inbound port rules which are your initial firewall settings on the VPS.
To be able to configure the VPS lateron from your Windows machine we will need remote access, so initially select SSH under Select inbound ports (we will secure this more lateron).

Ok, that’s the first page done, click the Next: Disks > button on the bottom to continue.
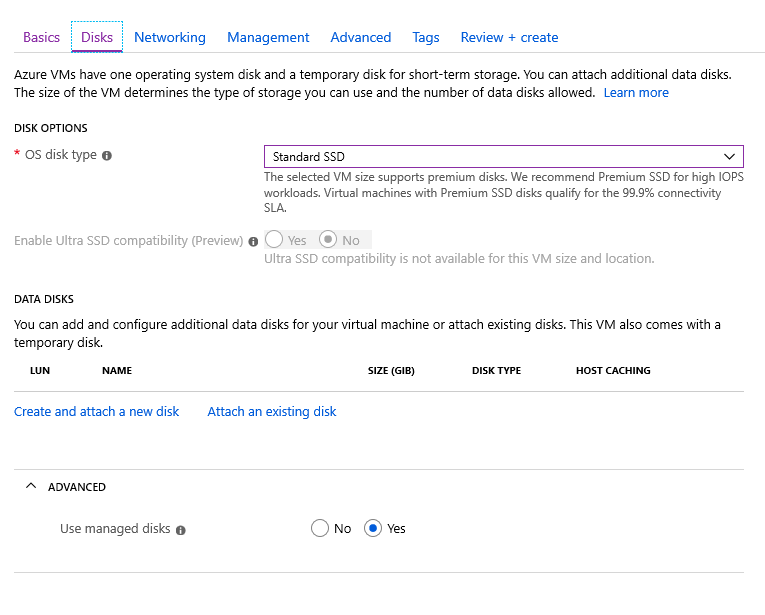
Not much needed to be changed on Disks settings, i would go for the Standard SSD to lower costs a bit more. Default storage for this VM type is 30GB on the OS disk which i have found is plenty to run a node. If you want to be certain you can add an extra data disk here, but imho it isn’t necessary.
Click Next : Networking > to continue.
Under networking you can leave most things default, but i would recommend creating a static public IP (it’s dynamic by default). To do this click on Create new next to Public IP ![]() and select Static under Assignment in the sidebar that will appear.
and select Static under Assignment in the sidebar that will appear.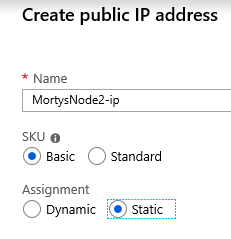
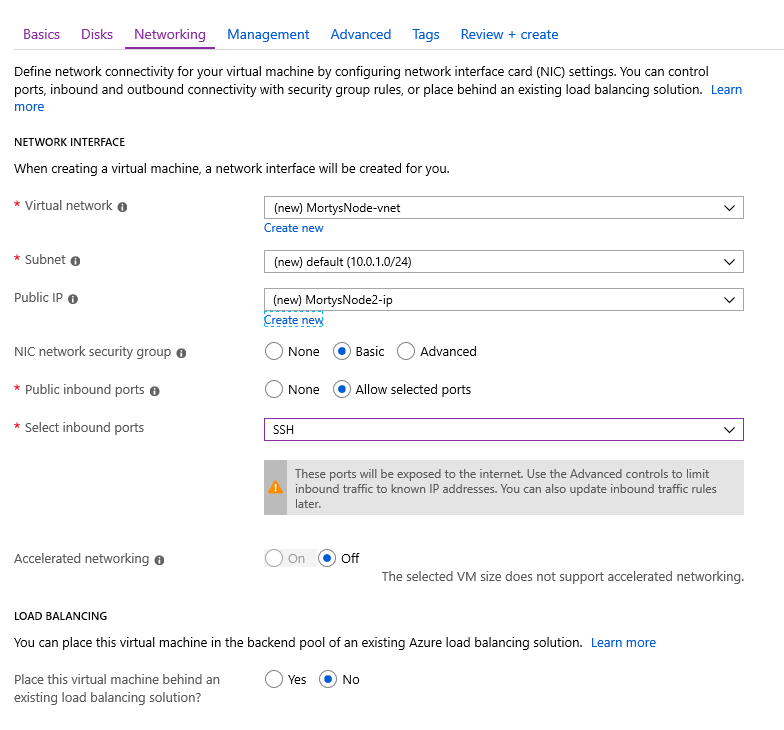
The rest of the settings can be kept default, so just click Review + Create to have a look at your settings and spin up the VPS. If everything looks good and you get the Validation passed checkmark at the top, click on Create to start your VPS.
You’ll be redirected to a overview page where the progress of the creation of your VPS is visible. After a couple of minutes you should see this screen:

And voila, we’ve created the Azure VPS for your node.
That’s it for this part. I will continue with the actual setup of the node software in the next part.
The next part is (finally) finished: https://www.mortysnode.nl/how-to-run-a-tn-node-part-2/


One Reply to “How to run a TN node (part 1)”
[…] the previous part you learned how to setup your Azure VPS, now let’s continue with the configuration and […]